In short
Facebook opens its own dialog; you pick the Pages you manage. For each Page you choose Messenger — its conversations land in your Inbox.
Before you start
- The Facebook profile that manages the Page. If Facebook doesn’t show your Page, that profile doesn’t manage it.
- No Page yet? Create one first on Facebook.
Steps
Open Channels and press Facebook Page
In MirageCHAT, go to
Channelsand press Facebook Page. Facebook’s dialog opens.Keep every Page ticked
Log in and allow what MirageCHAT asks for. Keep every Page and Instagram account ticked: what you untick there stops in all your MirageCHAT workspaces. You choose the Pages for this workspace in the next step.
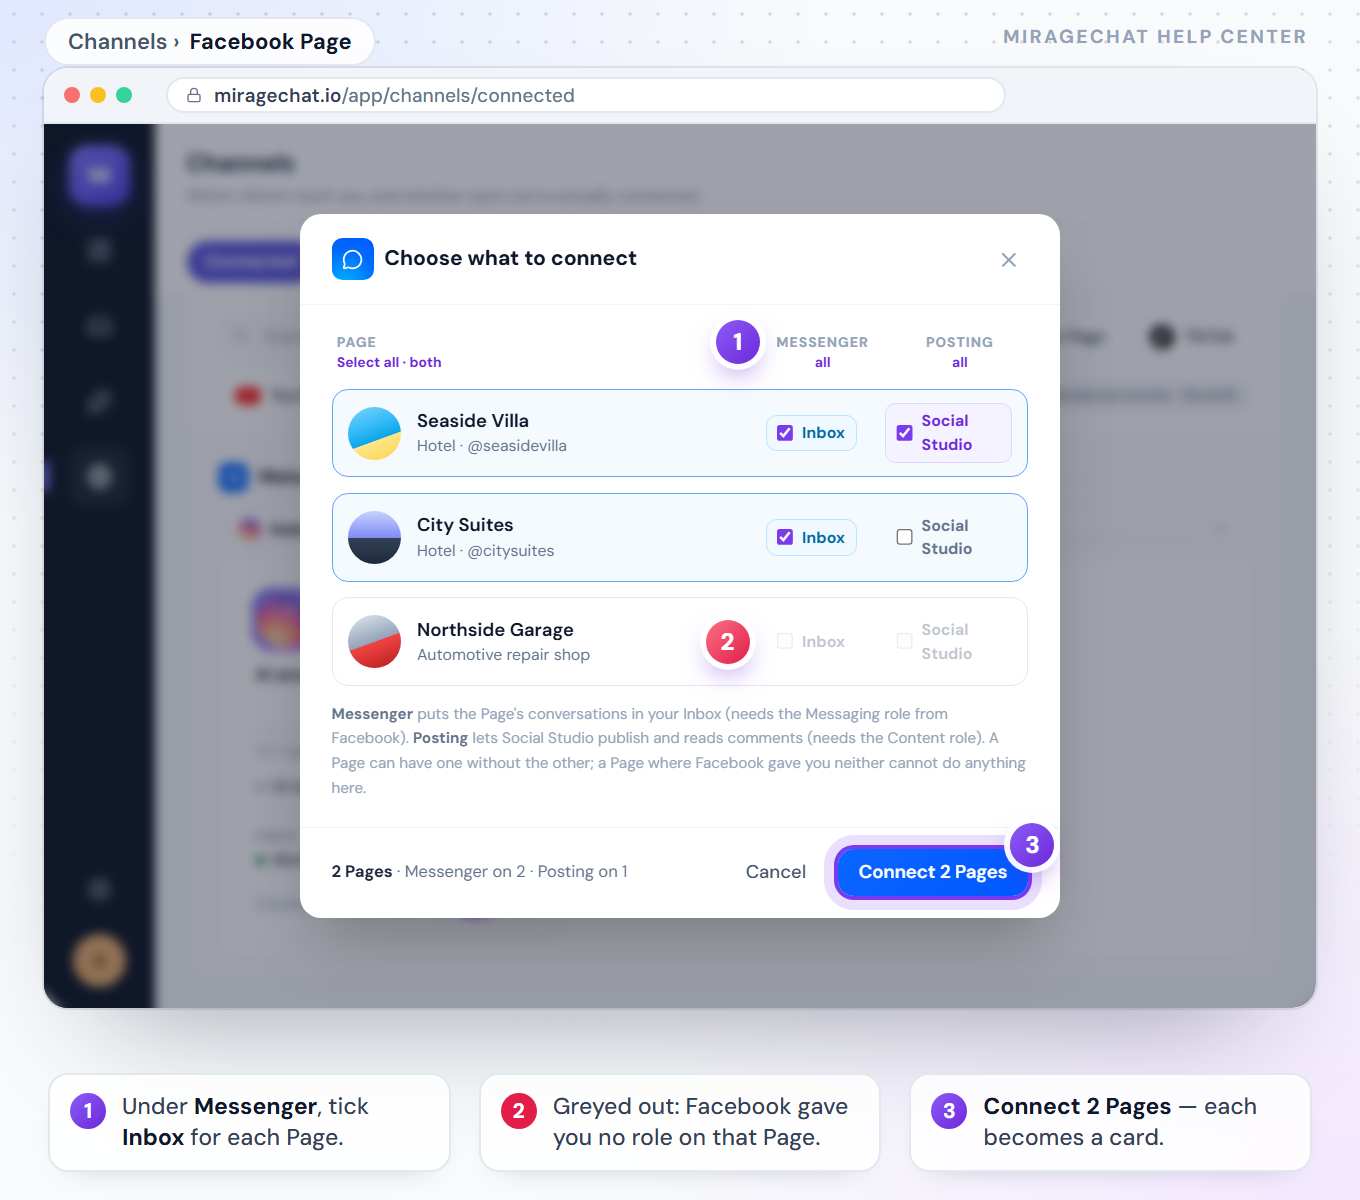
Choose what to connect
For each Page, tick Messenger — the Page’s conversations land in your Inbox. It needs the Messaging role on that Page.
Finish
Each Page becomes a card under Channels. Recent conversations import in the background.
Once the Page is connected, you can also publish to it with Instant Post, now or at a time you schedule.
Google is coming soon: your Google Business Profile in MirageCHAT, its reviews next to your Page’s, with posts and numbers — Connect Google.
Good to know
- A Page greyed out? Facebook didn’t give your profile the Messaging role on it. Ask the Page’s admin, then connect again.
- “In another workspace”? A Page lives in one workspace. To move it here, disconnect it in the workspace that holds it first.
- A Page unticked in Facebook by mistake? Its messages stop in every workspace where it is connected. MirageCHAT names it in red at once: press Open Facebook again and keep it ticked.
- Replying late: Messenger lets a business reply freely within 24 hours of the customer’s last message.
Ready?
Opens MirageCHAT in this tab. Sign in first if you’re not already.
Did this guide help?
Related guides
Still stuck? Write to info@miragechat.io with your workspace name. Never send passwords or codes.