In short
You design the chat in MirageCHAT, press Publish, and paste one line of code into your website once. After that, every change you publish reaches the site by itself.
1. Design it
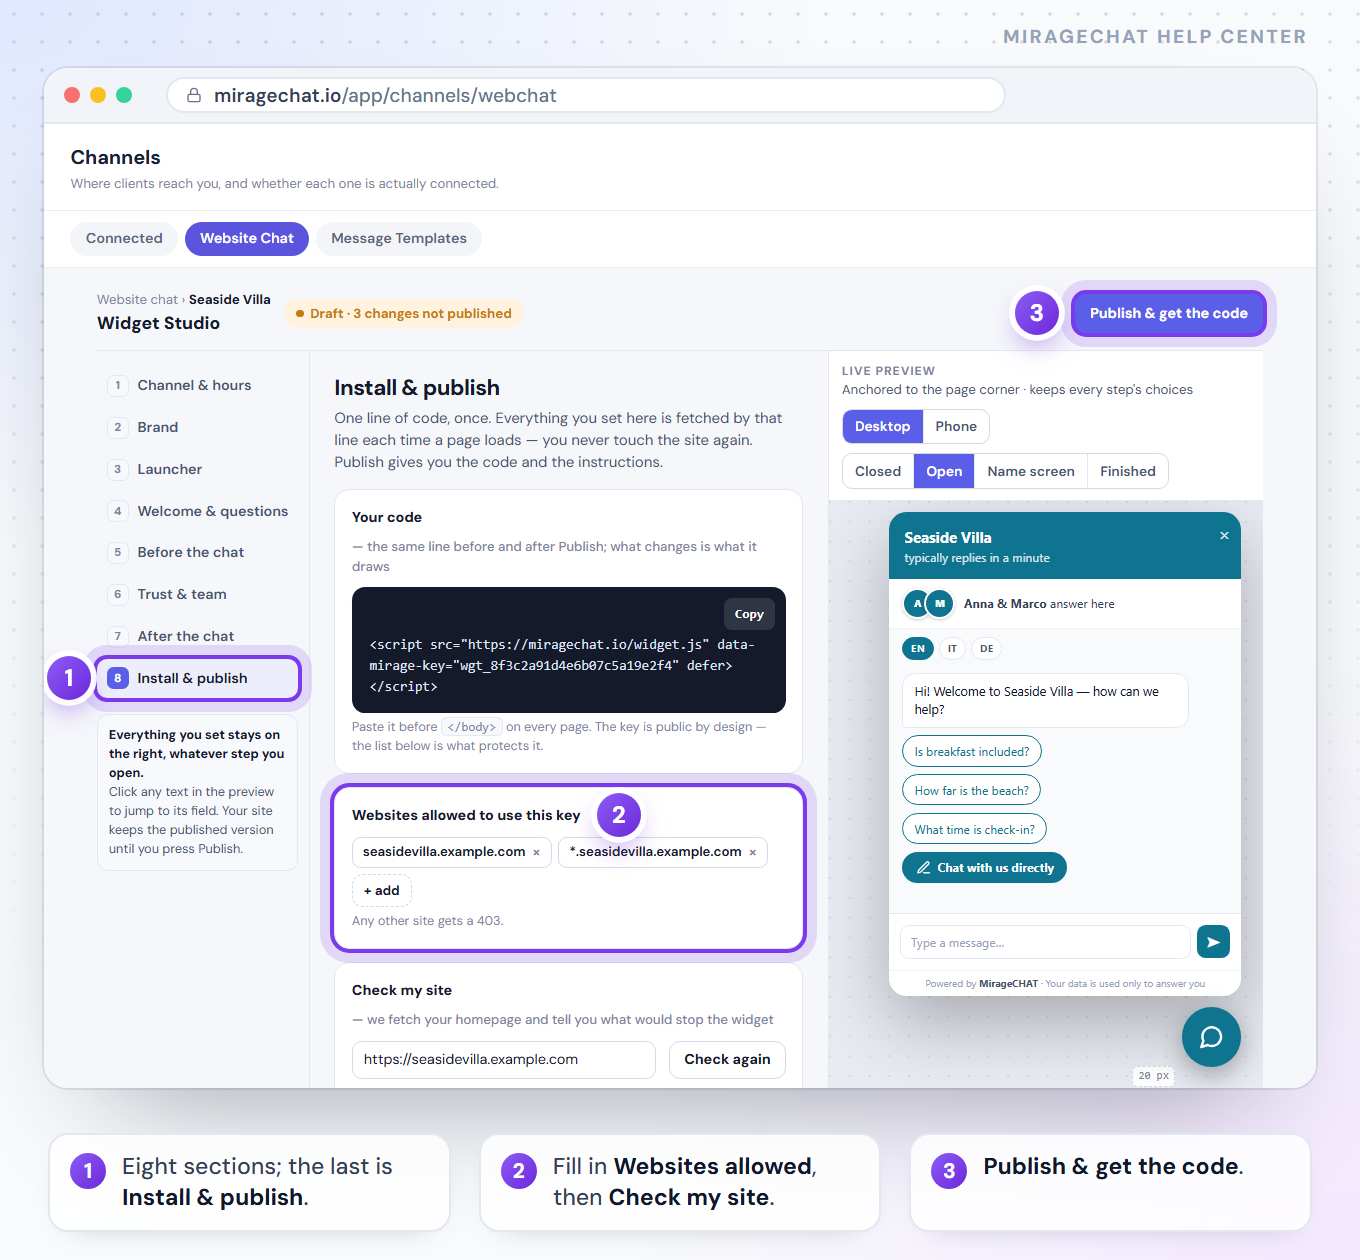
In MirageCHAT, go to Channels › Website Chat. Eight sections, left to right, with a live preview beside them:
- Channel & hours · Brand · Launcher · Welcome & questions
- Before the chat · Trust & team · After the chat · Install & publish
Paste your website address and MirageCHAT reads your pages — prices, location, policies, contact — and writes the first questions in your words.
2. Publish and get the code
Add your website address
In Install & publish, add the websites allowed to use your chat — for example
yourbusiness.comand*.yourbusiness.com. Any other site is refused.Check your site
Press the check: MirageCHAT opens your homepage and tells you if anything would stop the chat.
Press Publish & get the code
Publishing replaces the live version within a minute. You get one line of code and the instructions.
3. Paste the line into your website — once
Paste it before </body> on every page
In WordPress, the theme’s footer or a “custom code” field; in a React or Next.js site, the root layout. Keep
defer.Open your site
The launcher appears in the corner you chose. Tap a question — the written answer comes back.
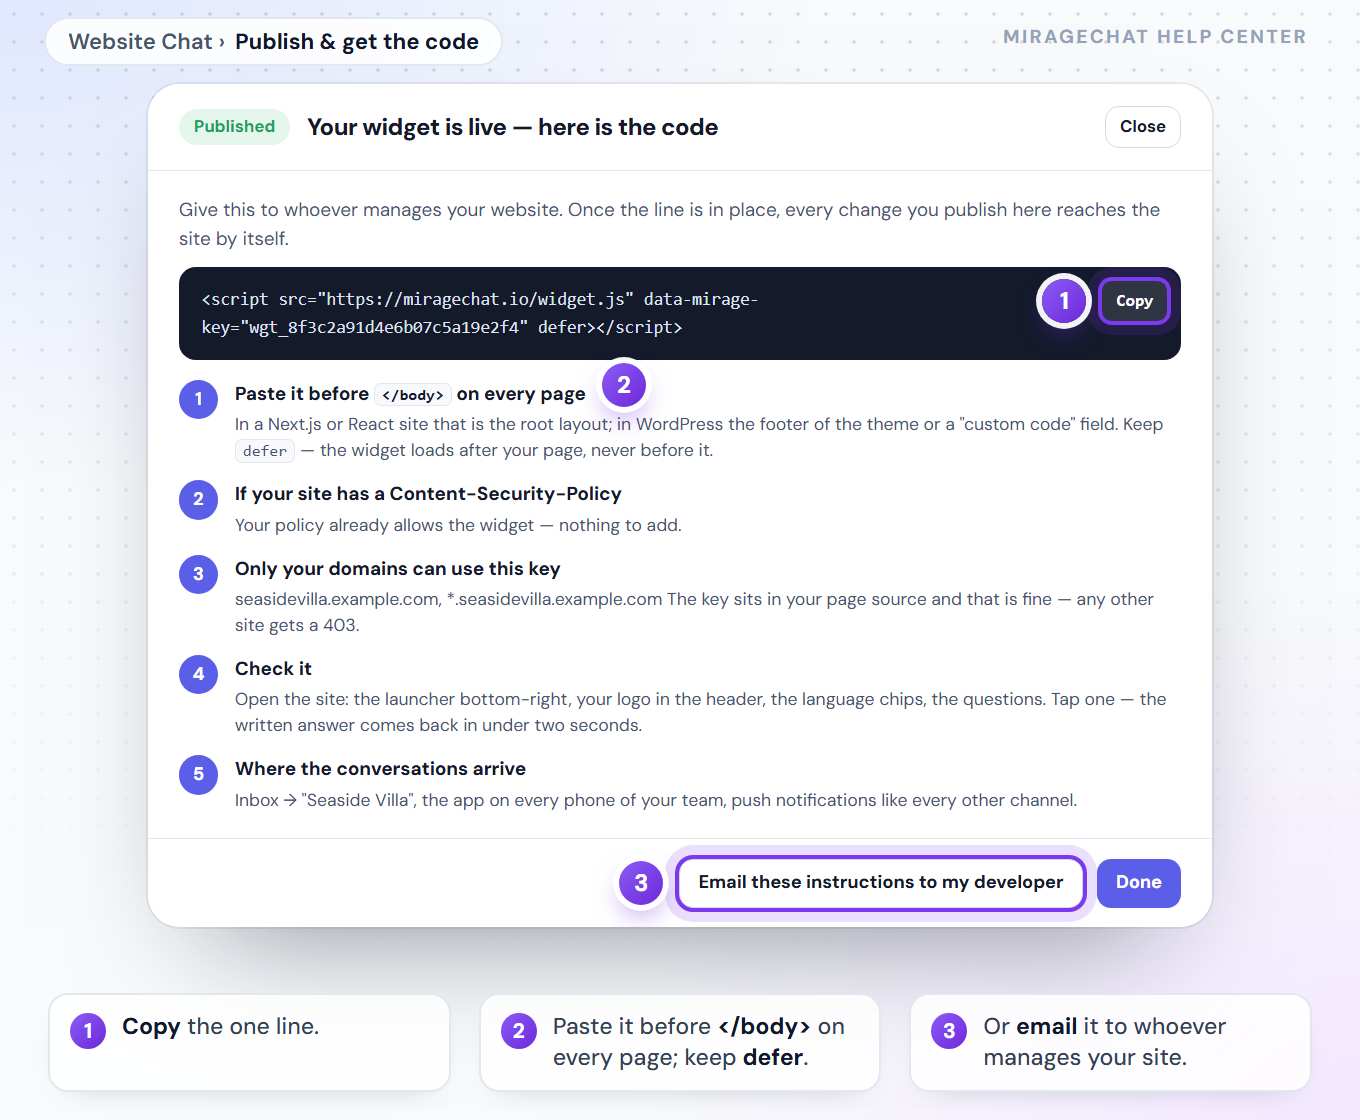
Give the line to whoever manages your website. Once it’s in place, you never touch the site again — every change you publish reaches it.
Ready?
Opens MirageCHAT in this tab. Sign in first if you’re not already.
Did this guide help?
Related guides
Still stuck? Write to info@miragechat.io with your workspace name. Never send passwords or codes.